Another quest in my WordPress life is the perfect list view for posts, events or articles. I simply like it simple, beautiful, well-thought and flawless responsive, and I rarely come across these attributes out-of-the-box. The plugin List Category Posts by Fernando Briano brought me closer to my dream, and with a bit of template coding and CSS the perfect post list view was accomplished (the described work was done with version 0.71 of the plugin).
The List Category Posts Shortcode
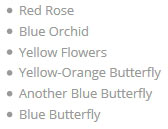
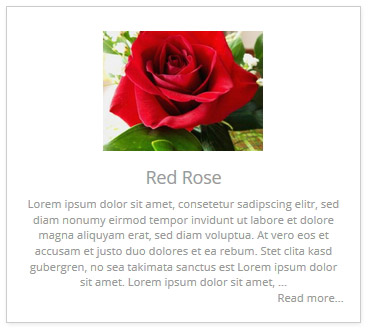
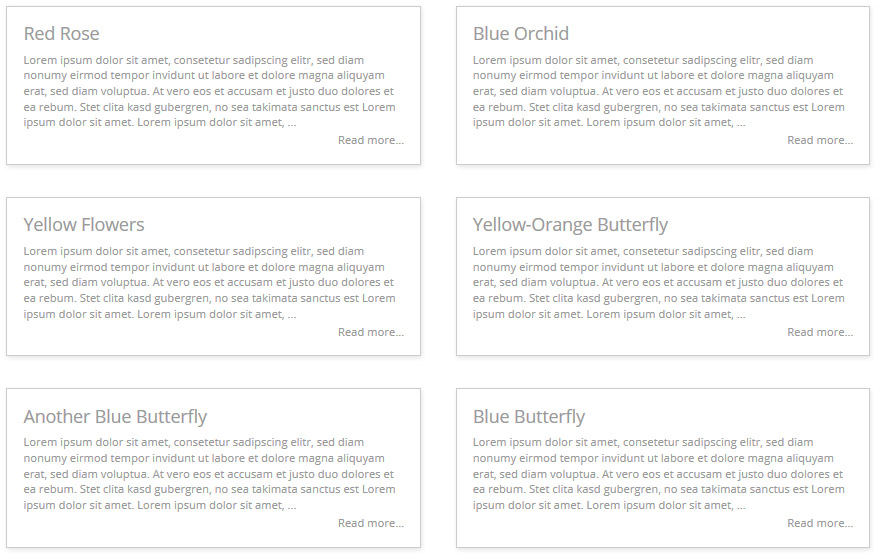
The basic shortcode to generate a list view of all your posts is simply [catlist]. It will display a simple unordered list with the titles of the articles:
Next we want to activate the thumbnails and the excerpt by using [catlist thumbnail=yes excerpt=yes].
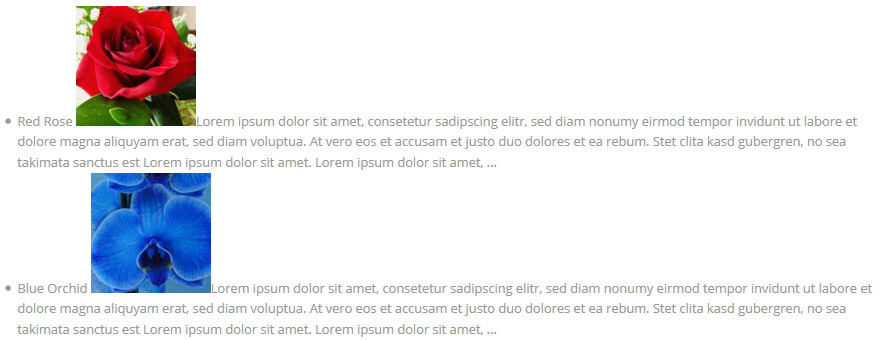
Not the most beautiful article list by default, I agree, and we could easily start beautifying the outcome with CSS, but there are also changes in the basic structure that need to be done to achieve our vision of a perfect post list. Fortunately, the plugin comes with an easy to adapt template system.
Creating our own Post List Template
The plugin looks for own templates in a folder called list-category-posts placed in the child-theme folder, e.g. wp-content\themes\child-theme\list-category-posts\perfectlist.php. You can download the folder with the file to copy it into your child-theme folder. I left all the various orginal comments in the file and added mine, while the following code is a reduced version to keep the article clearer. If you want to reproduce the applied changes, compare the downloaded file perfectlist.php with the default.php of the plugin to see the differences.
|
1 2 3 4 5 6 7 8 9 10 11 12 13 14 15 16 17 18 19 20 21 22 23 24 25 26 27 28 29 30 31 32 33 34 35 36 37 38 39 40 41 42 43 44 45 46 47 |
<?php $lcp_display_output = ''; $lcp_display_output .= $this->get_category_link('strong'); $lcp_display_output .= $this->get_conditional_title(); // Posts Loop global $post; while ( have_posts() ): the_post(); // Here we open the DIV for each post. If the post has a thumbnail, we get it. Else we can define a placeholder or delete the line to leave an empty space. if (has_post_thumbnail($post->ID)): $lcp_display_output .= '<div class="postlist withthumb">'; $lcp_display_output .= '<span class="thumbmagic">'; $lcp_display_output .= $this->get_thumbnail($post); $lcp_display_output .= '</span>'; else: $lcp_display_output .= '<div class="postlist withthumb">'; $lcp_display_output .= '<span class="thumbmagic">'; $lcp_display_output .= '<img src="http://your-domain.com/wp-content/uploads/default-thumb.jpg" alt="placeholder"></img>'; // Comment the line above if you don't want to use a placeholder $lcp_display_output .= '</span>'; endif; // Here we open an additional container DIV to wrap our content $lcp_display_output .= '<div class="lcp-container">'; $lcp_display_output .= $this->get_post_title($post, 'h3'); $lcp_display_output .= $this->get_comments($post); $lcp_display_output .= ' ' . $this->get_date($post); $lcp_display_output .= ' ' . $this->get_modified_date($post); $lcp_display_output .= $this->get_author($post); $lcp_display_output .= $this->get_custom_fields($post); $lcp_display_output .= $this->get_content($post, 'p', 'lcp_content'); $lcp_display_output .= $this->get_excerpt($post, 'p', 'lcp_excerpt'); $lcp_display_output .= '<div class="morelink">' . $this->get_posts_morelink($post) . '</div>'; // Closing our divs $lcp_display_output .= '</div></div>'; endwhile; $lcp_display_output .= $this->get_morelink(); $lcp_display_output .= $this->get_category_count(); $lcp_display_output .= $this->get_pagination(); $this->lcp_output = $lcp_display_output; |
Let’s understand a bit what the template does and in which parts I adapted it:
$lcp_display_output is the string which will gather all the information.
$lcp_display_output .= $this->get_something($post); are the successive lines that add the different elements that can be activated in the shortcode, as a category link or a conditional title. The functions get_something deliver a whole block of information and can pass on certain variables to influence their output. Read the whole instructions and the comments in the file for a complete overview.
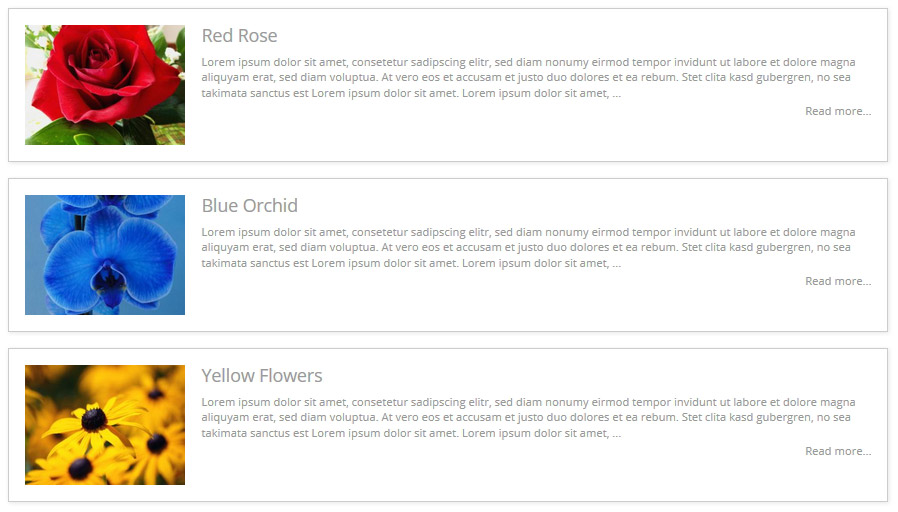
Next opens our loop that will catch the information for each single post. We will use a DIV container with a class .postlist instead of an UL list. For the moment, since we cannot check if the shortcode option thumbnail is set to yes, we have to work with different templates, so we assign the extra class .withthumb for an easier CSS formatting. If the post has a featured image, we open a span with a .thumbmagic class as a container for our padding-trick method and call the thumbnail through $lcp_display_output .= $this->get_thumbnail($post);. In case the post doesn’t have a featured image set, we can define a placeholder image, or simply delete or comment this line to keep an empty space.
We use H3 for our title, and P for content or excerpt. The posts_morelink is wrapped in the class .morelink so we can easily text-align: right the Read more text. This is all we have to do to prepare the HTML stucture to fit our needs. To view our list with our own template, we need to call it in the shortcode and at this occassion we also add the read more link:
[catlist thumbnail=yes excerpt=yes posts_morelink="Read more..." template=perfectlist]
The CSS Styling
Let’s go for some basic styling. The margin-left of the .lpc-container needs to be set according to the desired image width plus a bit of space between image and text. At the moment we use the WordPress thumbnail size of 150px plus 20px space. The overflow: auto takes care that the floating images will stay in the box even if the excerpt text is very little.
|
1 2 3 4 5 6 7 8 9 10 11 12 13 14 15 16 17 18 19 |
.postlist h3 {font-size: 22px; line-height: 1.2em; margin-top: 0; padding-top: 0} .postlist p, .postlist .morelink a {font-size: 14px; line-height: 1.4em;} .withthumb .lcp-container {margin-left: 170px;} .morelink {text-align: right;} /* Styling of the outer container */ .postlist { border: 1px solid #ccc; background: rgba(255, 255, 255, 0.7); box-shadow: 1px 2px 4px rgba(0, 0, 0, 0.1); margin: 20px 0px; padding: 20px; overflow: auto; } .thumbmagic { float: left; } |
Positioning magic
The list could be done with the WordPress-generated thumbnails, but to become independent in our choice of sizes, I integrated a wonderful technique that I found during my quest for the perfect calendar. With this padding-bottom trick we can create an equal cropping of bigger images, opening the way to display medium or large images of landscape or portrait format in any size and landscape or portrait endformat we want. Sounds amazing? It is! Let’s have a look at the CSS code. We float the .thumbmagic image container, so it doesn’t drive out the text. The display– and positioning parameters are part of the padding-bottom trick. The width we can freely choose to define the endformat of our thumbnails, and with the padding-bottom we assign our desired height.
Now, with the .thumbmagic img we define whether a 100% height with an auto width, if we want to use a portrait endformat, or 100% width with an auto height, if we want to use a landscape endformat. We also set a min-width or min-height for the case of images with a lower ratio than our choosen proportions to not leave a white space. The rest is part of the trick as you can read in detail in the above mentioned calendar post.
|
1 2 3 4 5 6 7 8 9 10 11 12 13 14 15 16 17 18 19 20 21 22 |
.thumbmagic { float: left; display: inline-block; position: relative; overflow: hidden; width: 200px; height: 0; padding-bottom: 150px; } .thumbmagic img { position: absolute; left: 50%; top: 50%; border-radius: 0; max-height: none; max-width: none; /* min-width: 200px; width: auto; height: 100%; /* Use for portrait display */ min-height: 150px; height: auto; width: 100%; /* Use for landscape display */ -webkit-transform: translate(-50%,-50%); -ms-transform: translate(-50%,-50%); transform: translate(-50%,-50%); } |
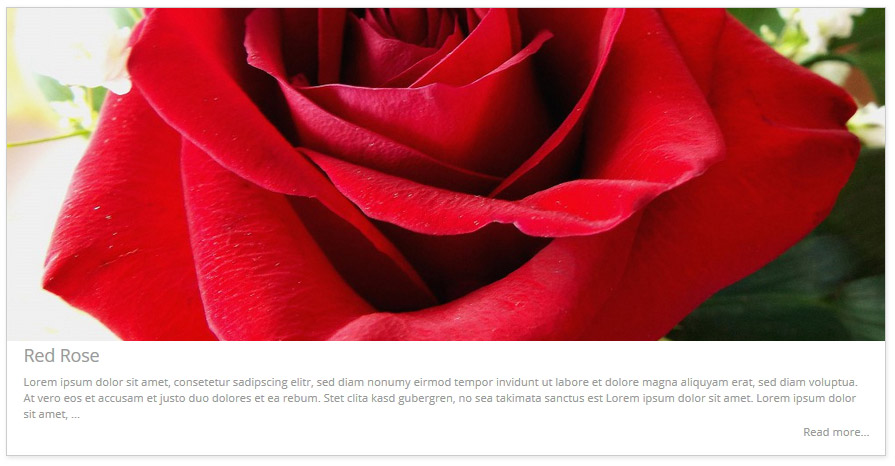
Since we have chosen an image width of 200px, we need to set the .lcp-container from above CSS to 220px instead of 170px. Furtheron the image resolution is not enough, and to increase the image quality we will use the medium size instead of the thumbnail size by extending our shortcode with the thumbnail_size attribute: [catlist thumbnail=yes thumbnail_size=medium excerpt=yes posts_morelink="Read more..." template=perfectlist]
Sidenote: I want to mention that, despite the free choice of sizes, it can still be preferable to use the thumbnail size and increase its dimensions in the media settings accordingly (most likely you will need to regenerate the thumbnails after changing the settings, e.g. with the plugin Force Regenerate Thumbnails). Why? Because only the “official” WordPress thumbnail size can be edited directly in WordPress to customize the cropping of the images that would look strange with automated cropping, e.g. a cut-off head.
Responsive magic
Last but not least, it should look good also on mobile devices, and my ideal was to move the thumbnail above the centered title, excerpt and read more link. This is achieved with the following CSS code:
|
1 2 3 4 5 |
@media screen and (max-width: 800px) { .thumbmagic {float: none; display: block; margin: 10px auto 20px auto;} .thumbmagic:empty {display: none;} .withthumb .lcp-container {margin-left: 0px; text-align: center;} } |
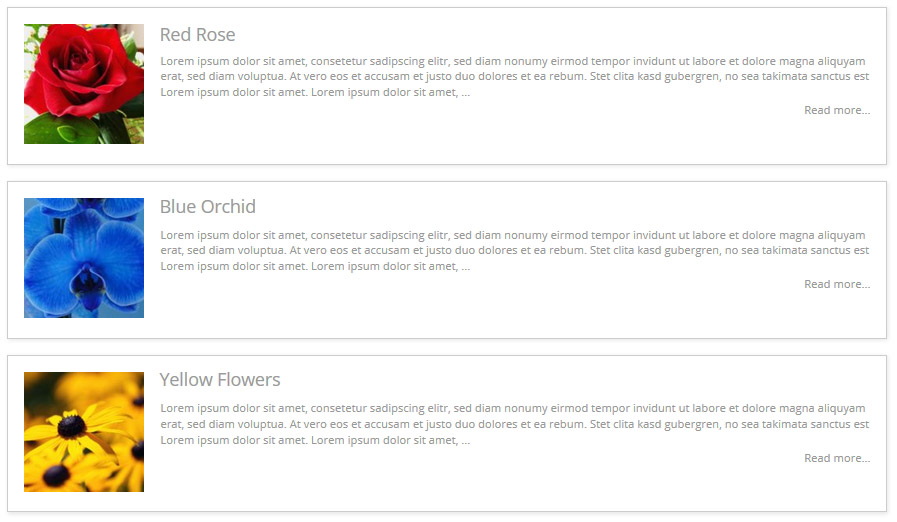
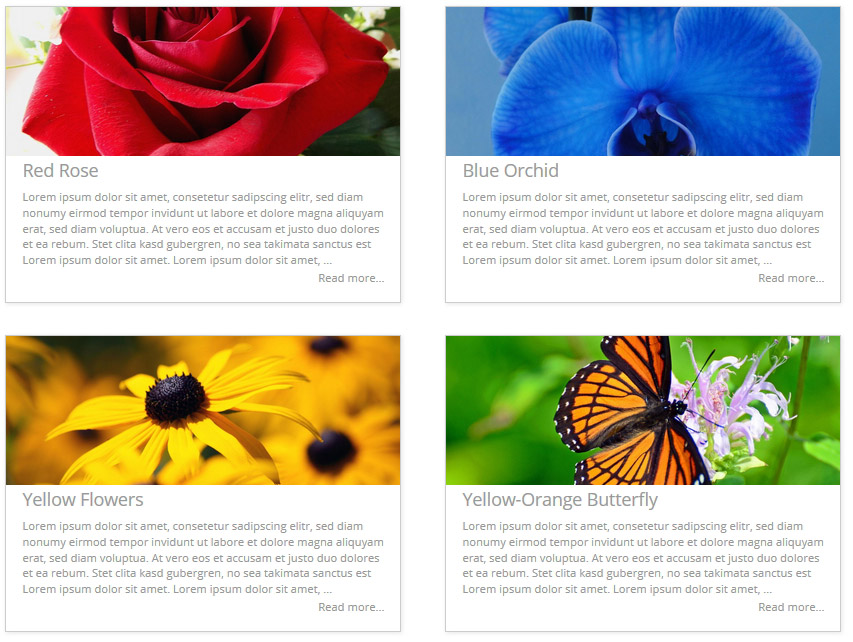
Card View
As an addition we can also easily create a card view. For the moment I don’t know a way to transmit attributes through the shortcode, which would be most easy to use, so we need to work with a second template file, in which the class cardview is added to the postlist-div. You find it also in the downloaded folder from the template chapter. Call it in your article like this for example: [catlist thumbnail=yes thumbnail_size=large excerpt=yes posts_morelink="Read more..." template=cardview]
Now we only need to add these lines of CSS:
|
1 2 3 4 |
.cardview.postlist {padding: 0;} .cardview.postlist h3 {margin-top: 20px;} .cardview .thumbmagic {float: none; width: 100%; padding-bottom: 38%;} .cardview .lcp-container {margin: 0; padding: 0 20px 20px 20px;} |
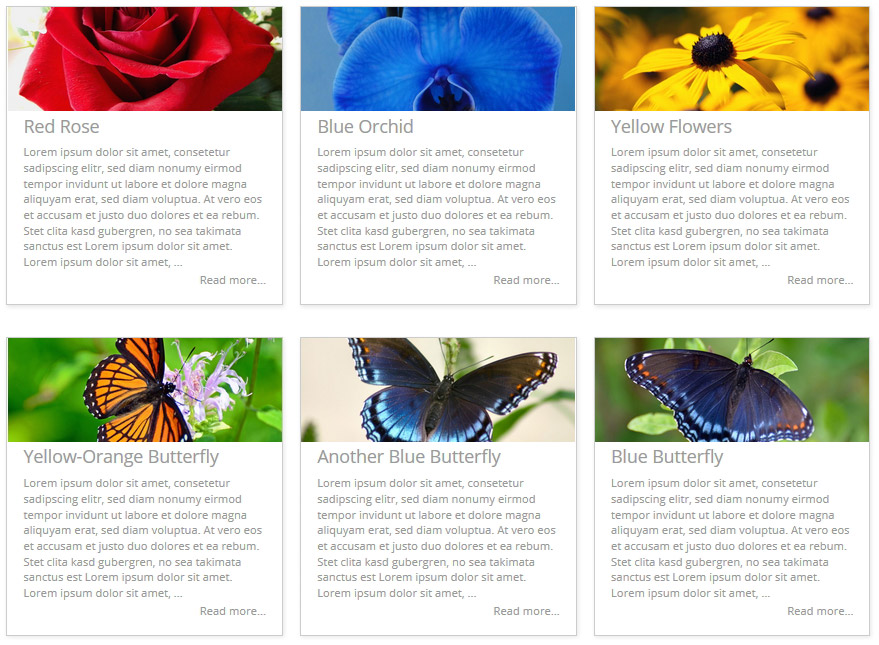
Multi-colum
As we see, it is a bit big and to keep the maximum width in a nice format and use the space better, we will integrate a multi-column solution to round it up. We start with a 2-column approach:
|
1 2 3 4 5 |
@media ( min-width: 767px ) { .cardview.postlist {float: left; width: 48%;} .cardview.postlist:nth-of-type(2n+1) {margin-right: 4%;} .cardview.postlist:nth-of-type(2n+3) {clear: both;} } |
What happens there? Our postlist boxes start to float and are reduced to 48% width so two are floating lovingly next to each other. Then we assign the remaining 4% space to every second box (2n) starting with the very first one (+1), helping them to not become too attached to each other. To assure that every couple starts perfectly aligned in the new row, we now need to address again every second one but starting only with the third box (the first one in the second row) to clear the float of the first couple. That’s the basic mechanism wrapped in a bit of poetry. In the end we can wrap our lovely couples in a media query so below a certain resolution they stand on their own again.
Responsiveness
With the media query we already installed a basic responsiveness, but why not going further. Let’s start with a three-column layout on desktop screens, reducing into a two-column on tablets and one-column on phones:
|
1 2 3 4 5 6 7 8 9 10 |
@media ( min-width: 767px ) and ( max-width: 1100px ) { .cardview.postlist {float: left; width: 48%;} .cardview.postlist:nth-of-type(2n+1) {margin-right: 4%;} .cardview.postlist:nth-of-type(2n+3) {clear: both;} } @media ( min-width: 1101px ) { .cardview.postlist {float: left; width: 32%; margin-right: 2%;} .cardview.postlist:nth-of-type(3n+3) {margin-right: 0;} .cardview.postlist:nth-of-type(3n+4) {clear: both;} } |
And what if we don’t want thumbs?
Easy, we just choose the nothumb template file which you also find in the downloaded folder by using this shortcode:
|
1 |
[catlist excerpt=yes posts_morelink="Read more..." template=nothumb] |
Pagination
The plugin also comes with a pagination function, and the following CSS takes care that it also looks nice:
|
1 2 3 4 5 |
/* Pagination */ .lcp_paginator li {border: 1px solid #ccc!important; box-shadow: 1px 2px 4px rgba(0, 0, 0, 0.1); color: #777;} .lcp_paginator li a {color: #aaa;} ul.lcp_paginator {padding: 0 0 20px 0!important;} ul.lcp_paginator:before {content: ""; display: table; clear: both;} |
Conclusion
Quite nice, I simply love it. This is the end of the story for the moment, a long quest to my perfect list view for posts, events and articles. You can use the same CSS formats e.g. in the template system of the Events Manager, styling your events in this way as I did for the calendar of the ATMAN Yoga Federation. You can apply it to the blog- and archive pages. The only cherries missing on top would be to pass on if thumbnail is set to yes and choose the card view through the shortcode itself, in this way getting along with just one template file, so if anyone has a clue, let me know in the comments. I hope you enjoyed the trip and wish you a lot of fun with this wonderful plugin and its possibilities. Big thanks to its creator Fernando Briano.
And here once again the complete CSS code for your own perfect postlist. Simply copy into some custom CSS option of your theme or the style.css of your child-theme, and together with the downloaded template files and the correct shortcodes you are ready to go. Post your website in the comments, I would love to see the code in action elsewhere.
|
1 2 3 4 5 6 7 8 9 10 11 12 13 14 15 16 17 18 19 20 21 22 23 24 25 26 27 28 29 30 31 32 33 34 35 36 37 38 39 40 41 42 43 44 45 46 47 48 49 50 51 52 53 54 55 56 57 58 59 60 61 62 63 64 65 66 67 68 69 70 71 72 73 74 75 76 77 78 79 80 |
/******* Postlist 2018-08-05 *******/ /* Some basic styling */ .postlist h3 {font-size: 22px; line-height: 1.2em; margin-top: 0; padding-top: 0} .postlist p, .postlist .morelink a {font-size: 14px; line-height: 1.4em;} .withthumb .lcp-container {margin-left: 220px;} .morelink {text-align: right;} /* Styling of the outer container */ .postlist { border: 1px solid #ccc; background: rgba(255, 255, 255, 0.7); box-shadow: 1px 2px 4px rgba(0, 0, 0, 0.1); margin: 20px 0px; padding: 20px; overflow: auto; } /* The image magic */ .thumbmagic { float: left; display: inline-block; position: relative; overflow: hidden; width: 200px; height: 0; padding-bottom: 150px; } .thumbmagic img { position: absolute; left: 50%; top: 50%; border-radius: 0; max-height: none; max-width: none; /* min-width: 200px; width: auto; height: 100%; /* Use for portrait display */ min-height: 150px; height: auto; width: 100%; /* Use for landscape display */ -webkit-transform: translate(-50%,-50%); -ms-transform: translate(-50%,-50%); transform: translate(-50%,-50%); } /* The responsive magic */ @media screen and (max-width: 800px) { .thumbmagic {float: none; display: block; margin: 10px auto 20px auto;} .thumbmagic:empty {display: none;} .withthumb .lcp-container {margin-left: 0px; text-align: center;} } /* The cardview */ .cardview.postlist {padding: 0;} .cardview.postlist h3 {margin-top: 20px;} .cardview .thumbmagic {float: none; width: 100%; padding-bottom: 38%; margin-top: 0;} .cardview .lcp-container {margin: 0; padding: 0 20px 20px 20px;} /* Multicolumn */ @media ( min-width: 767px ) { .cardview.postlist, .nothumb.postlist {float: left; width: 48%;} .cardview.postlist:nth-of-type(2n+1), .nothumb.postlist:nth-of-type(2n+1) {margin-right: 4%;} .cardview.postlist:nth-of-type(2n+3), .nothumb.postlist:nth-of-type(2n+3) {clear: both;} } /* Multicolumn 3 > 2 > 1 Version */ /* Comment the upper version and uncomment this one to use it @media ( min-width: 767px ) and ( max-width: 1100px ) { .cardview.postlist, .nothumb.postlist {float: left; width: 48%;} .cardview.postlist:nth-of-type(2n+1), .nothumb.postlist:nth-of-type(2n+1) {margin-right: 4%;} .cardview.postlist:nth-of-type(2n+3), .nothumb.postlist:nth-of-type(2n+3) {clear: both;} } @media ( min-width: 1101px ) { .cardview.postlist, .nothumb.postlist {float: left; width: 32%; margin-right: 2%;} .cardview.postlist:nth-of-type(3n+3), .nothumb.postlist:nth-of-type(3n+3) {margin-right: 0;} .cardview.postlist:nth-of-type(3n+4), .nothumb.postlist:nth-of-type(3n+4) {clear: both;} } */ /* Pagination */ .lcp_paginator li {border: 1px solid #ccc!important; box-shadow: 1px 2px 4px rgba(0, 0, 0, 0.1); color: #777;} .lcp_paginator li a {color: #aaa;} ul.lcp_paginator {padding: 0 0 20px 0!important;} ul.lcp_paginator:before {content: ""; display: table; clear: both;} |


Thank you VERY VERY much – it’s a BEAUTIFUL thing!!!
Even a noob like me managed to follow the instructions – so AMAZING job!!!
Thank you.
Thanks for this information. It almost works: the only thing is that the outer container width is too small, so I get this: https://ibb.co/c02sdF of the page: http://www.kemet.nl/example-list-category/
I tried to add an width: __;px to the outer container css but that didn’t work. I would appreciate some help. Thanks in advance.
Richard, it is because of the multicolumn set to width: 48%. The multicolumns actually doesn’t make sense with the regular view, so I updated the code now accordingly to apply the multicolumns only in .cardview and .nothumb. The regular format with a thumbnail to the left is not suitable for multicolumn. I also reloaded the zip file with the templates, because the file nothumb.php had to be adapted.
I’m very new to wordpress and website development. I’m having an issue with the CSS content showing up. Just to clarify, I am to copy and paste all the CSS code (found in the conclusion) into my templates style.css file, correct? Thank you for the help. Any assistance would be much appreciated.
Yes Rebecca, but it is best to use a child theme, you find a lot of information about how to make one in the net. Another easy way is to use the DIVI Theme Options, they have a Custom CSS section as well. And also the Theme Customizer comes with it now, so you have a few options to choose from.
Hi,
this is the BEST customization of the BEST WP plugin out there. Thank you a lot.
I really appreciated your post and applied this template on my blog.
I have encountered just one problem, with the responsiveness, that I have fixed it by adding: “.lcp-container {margin-left: 0px; text-align: center;}” in here: @media screen and (max-width: 600px).
Without this line both the title and the exerpt were squeezed on the right side of the screen.
Here is the result:
https://www.ideeregalouomo.net/idee-regalo-uomo-50-anni/
https://www.ideeregalouomo.net/idee-regalo-uomo-50-anni/
Thank you again, keep up with the good work!
Thanks Roberto for sharing your solution, it might help others as well
My issue is when I view it on a mobile screen, all the text and stuff gets pushed to the right. Is this because of the padding setting?
Dear Allen,
there was a small missing class in the code that made the .lcp-container margin not reset to 0. I published the fixed code now and the responsiveness is working correct again. I also changed the breakpoint from 600px to 800px at this occassion for better appearance.
I am having a problem with the responsive elements. The theme does not format properly on a screen less than 600 px. The text appears to have a left-margin of 200px that is preventing it from lining up below the image.
Below is a screenshot using the responsive test tool in firefox. I confirmed that the same issue happens in chrome as well.
Dear Chris, it is the same issue as Allen described and the fixed code is up now.
Hi guys,
I have used this perfectlist.php and it is great.
I am not that good in php, but is it possible to adjust the css (or whatever) to get the same layout as the layout of wordpress? On top the thumb, below that the text excerpt and below that two lines with the link to the other posts?
Thanks,
Thank you for sharing this. It’s exactly what I needed. You provided clear concise details on how to implement this list, which is beautifully done.
Great job. You are my personal WP LCP gods.
THX.
Its Wonderful,I like to try t now,Thanks a lot.
soooooooooooooooooooooooooo tnnnnnnnnnnnnnnnnnnnnnx
Hi, many thanks for the article. It’s working except one detail.
The text next to the thumbnail is aligned with the bottom of the thumb.
Does anyone else have this problem?
If you’ve got a hint for me I’d appreciate it.
Thanks
After struggling to create my own LCP template that does just what I want, I decided to download and try your perfect-list template. Lo and behold, it’s perfect. Thank you for your generosity in sharing this with us!
It’s beautiful! It did take me awhile to get it working. I finally checked the catlist instructions and they said templates go in a different directory, I moved yours there and it works!
Thanks for letting us know, yes over the years the plugin might have had some structural changes that I haven’t followed up on, I hope to soon make a deep dive back into it.
First, let me thank you for your awesome work. I started working on a project back in November 2019 and used the List Category Posts plugin to aid my efforts. The output was less than spectacular until I found your template.
But, there was still a problem. Trying to use the EXCERPT feature with full HTML output (photos, proper formatting, etc.) presents unique challenges, because it is POSSIBLE that an HTML tag might be left “broken” by the arbitrary cutoff point of the excerpt. I had to write code to a) support the proper operation of the excerpt function within the plugin and b) deal with the possibility of broken tags in your template code. I have created a fix for both issues. I sent my code to the plugin creator, but other than thanking me, he never actually integrated the code. Oh well. If you’re interested in the changes I made to YOUR thumbnail code, just send me a message and I’ll share the code with you.
Thanks again for your work. I couldn’t have done this without your initial contribution.
So I guess Jack this was your first comment on this, back in 2021, not as long as 2019, but I agree, time flies these years and the world became very different between these two years.
Hello,
by following the tutorial on the page “http://sundari-webdesign.com/wordpress-the-quest-to-my-perfect-list-view-for-posts-events-and-articles/” I don’t not get the same result (the image is cut off … I only see a 10% band of the image)?!?
Could someone tell me where my problem is coming from?
Sorry but my site is not online I cannot provide you with a visual and apparently we cannot send an attachment here …
Thanks for these codes! Using it I have an alignment issue in the perfectlist view: post title and exerpt are ok in the right part of the container but start under the thumbnail image level as if there was a top margin eqal to the thumbnail height above the text…
Hey Bruno, I will soon take a look at all the issues that appeared over time with this code and hope I can fix them all. Will keep you updated.
Hello! Thank you very much for the wonderful manual!
But I have a problem: Post text doesn’t want to wrap around the image. Link to site screenshot and css.
https://ibb.co/2Wb1PxQ
Sorry for my bad English and thanks in advance for your help and hard work!
Hey Alexander, I will soon take a look at all the issues that appeared over time with this code and hope I can fix them all. Will keep you updated.
Sofian, I don’t recall whether I wrote to you back in 2019 after trying to use your nothumbnail template and finding a small problem. The issue was if you were displaying an excerpt with the no_strip option set to retain HTML tags, then it was possible that the excerpt would “end” right in the middle of a tag. This would cause the remaining document to be misaligned. I came up with a solution (an edit) of the nothumb template file, and although it is crude (my PHP skills are not ideal), it does work. I’m wondering whether you would be interested in implementing my ideas into your code. If so, please get in touch and I will freely share my code. The website below shows the results of my modifications.
Hey Jack, indeed, my last 5 years were totally dedicated to build up an online yoga academy, so I didn’t take time for own DIVI projects any longer. But finding so many grateful comments on my dusty website today I decided to bring it back to life. Once I dig through approving the comments I am sure I found yours as well and yes, I’d happily take a look at your code. Seems my List Quest was not working for some, or over the years of updates might have bumped into incompatibilities, but it’s too good to not fix it. Thanks a lot.